Easy Steps for Styling Wavy/Curly Hair aka Wet-Setting

Looked up images of “wet hair” and this is the best I could find *This is not what wet-setting looks like
I have written about why someone should blow dry their hair if they want added volume and texture in their hairstyle (here). However, if you have wavy or curly hair and have tried blow drying before, you may have found that the results were a little too voluminous, with lots of fly-away hairs and it probably dried out your hair too much. In the same post, I mentioned that there are two ways of styling hair: heat setting and wet setting. Today we're going to focus on the latter and explore why it is my preferred method of styling wavy/curly hair.
What is Wet-Setting?
It is a styling method that involves adding product to damp hair and letting it air dry in place to achieve a certain look. An old-school, yet very well-known example of wet-setting is called "Finger Waves". That process requires adding gel to wet hair and combing the individual waves and ridges into place before letting things dry. Optionally, one can then brush out the hair after it has dried to break up the crunchy texture of hair gel and this will add controlled volume that maintains the shape of the waves. Though finger waves are no longer common and tend to only re-emerge for 1920s-themed dinner parties, the method can be applied to modern-day hairstyles as well to achieve the same benefits.
Why Wet Set? AKA What are those benefits?
The biggest reason I will choose wet-setting is that without the use of heat, the hair dries naturally which means that the moisture that wavy/ curly hair needs is preserved as much as possible. This reduces the chances of frizzy or poofy hair, as the moisture that is locked in also helps weigh the hair down.
Wet-Setting also allows for a less-is-more approach to styling the hair that results in only a handful of simple steps as opposed to blow drying, which requires more attention to do properly. The trade off is that it just takes longer for the hair to fully dry and set in place when wet setting. We are able to accommodate for this by using a diffuser attachment to our blow dryers. Though technically this means we are blow-drying the hair now with heat, I would say that this is an optional step that only speeds up natural drying and is not necessarily the same as using heat to manipulate the hair.
For example, let's look at laundry. You can air dry it or use a tumble dryer, but neither is the same as using a clothing iron to smooth out wrinkles even if the tumble dry and clothing iron both use heat.
How to Wet Set?
I've mentioned how simple the steps are for Wet Setting and now it is time to get into it.
Just like the approach with blow drying, I am going to break this up into two parts: Global Direction and Local Texture.
Global Direction.
With damp hair, you will want to apply a product to the hair. For wavy/curly hair, I would recommend using a curl cream. The one that I have come to enjoy, along with many of my clients is the Curl Cream by Verb. Curl creams are designed to lock in moisture for your hair and prevent frizz, while also providing a decent amount of hold to help with styling. Alternatively, you could use a gel, which is the more traditional way of going about Wet-Setting. The hold on gels will be greater, but I veer away from them because they emphasize too much of a wet look, and are also harder to work with when applying through your hair.
Once the product is thoroughly applied throughout the hair, you will then work on setting the style of the hair. This could mean finding a parting, bringing it all forward, or directing it all backward. I would recommend at this stage to actually comb or brush the hair. You'll distribute the product evenly throughout all the hair strands and smooth everything out, reducing the chance of fly-away hair even more.
When deciding on a global direction, you want to keep the finished hairstyle in mind. Whatever position you put the hair in when wet will be close to what the final result is when dry.
Once happy with the overall direction of the hairstyle, this is when you want to let it dry with as little disturbance to the hair as possible. That is why a diffuser is so beneficial. With it's design, the air flow is spread out and more gentle as opposed to the concentrator attachment that will blast the hair and dry it too quickly. Again, you do not need to use a hair dryer, you just need your hair to dry in place. With shorter hair, that can be quite simple as you can go about your morning and the hair will most likely maintain the general shape you set it in while it dries. With longer hair though, you may want to consider getting a hair band to hold everything in place as it dries, gravity will try to force your hair to fall throughout the drying process, so you want to do what you can to prevent that from happening.
The time required for your hair to dry will vary, and a lot of patience is definitely needed no matter what method you decide to use. Once dry though, the hair should feel a little hard from the product, with little to no feeling of moisture to the touch. Once you've gotten to this stage, you can move on to local texture.

This hairstyle was achieved just by focusing only on global direction, where the hair was brought back. Notice that the finish on the hair looks similar to gel. This is what it should look like after drying, with very little to no frizz or fly-aways present.
Local Texture.
Your hair is now dry and following the shape and flow you want. You may find that it looks great the way it is and you're ready to get on with your day or you may find that the hair is a little flat and a little less wavy than you want. If that is the case for you, then you can start working on the finishing details. This can be done by running your fingers through your hair, breaking up the product and wet look, and giving it a more natural finish. You may want to scrunch your hair, or gently push it against the global direction that you set, just so the hair can spring back to life. Another approach is to brush out the hair, which will give it a more uniform smoothness and may help boost volume in certain areas. There is a lot of experimentation involved here, as you figure out what works best for you. Though, I would suggest being gentle and not overdoing it as that can lead to creating a frizzy and poofy mess really quickly. You don't want to undo all the hard work of letting it dry in place!
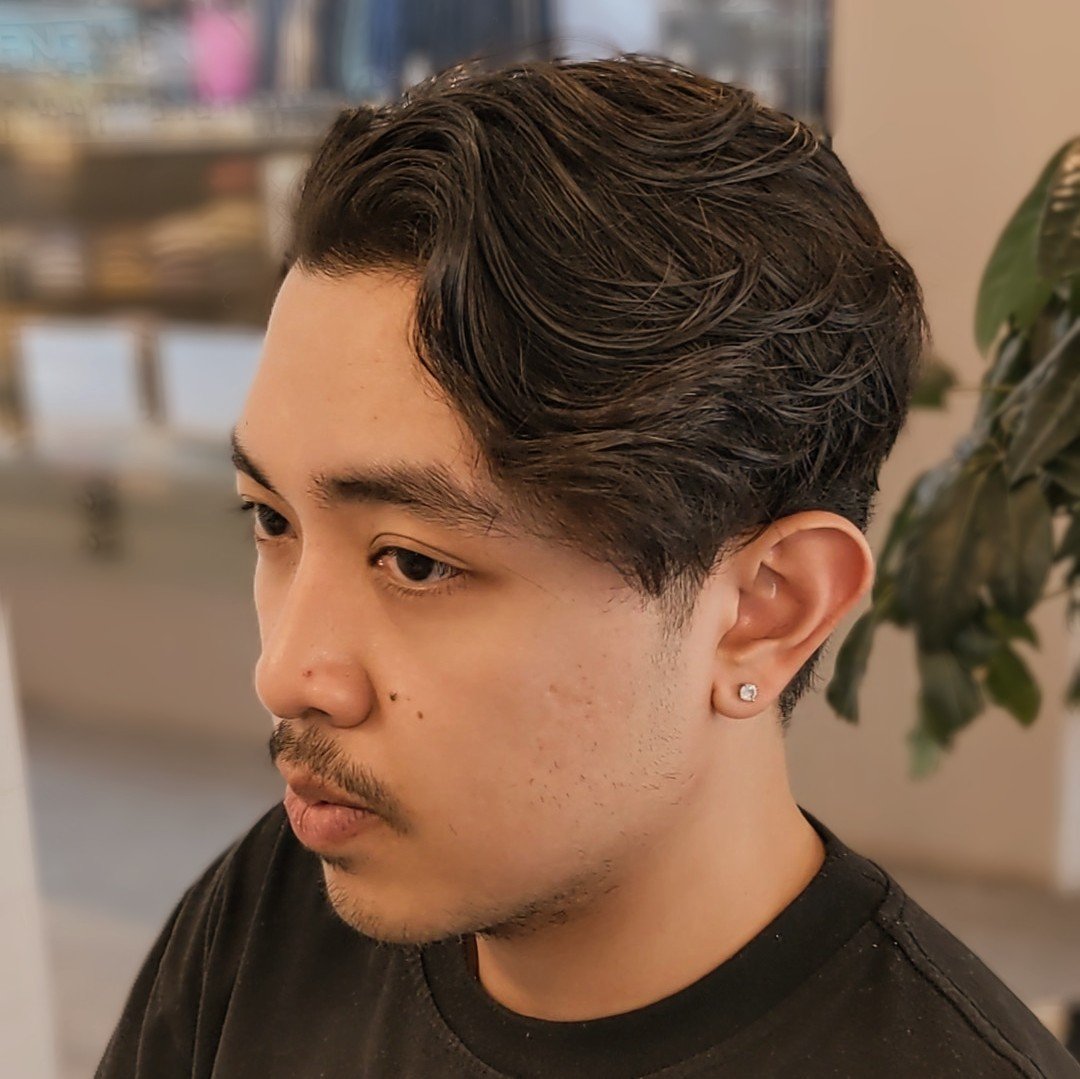
Local texture was addressed for this style. After the hair had dried, a brush was gently run through the hair following the global direction (the parting). This broke up some of the hardened gel texture and gave a bit more volume to the final look while still keeping frizz to a minimum.